
Caulking, Weatherstripping, and Sealing: The Low-Cost Fixes That Cut Energy Bills

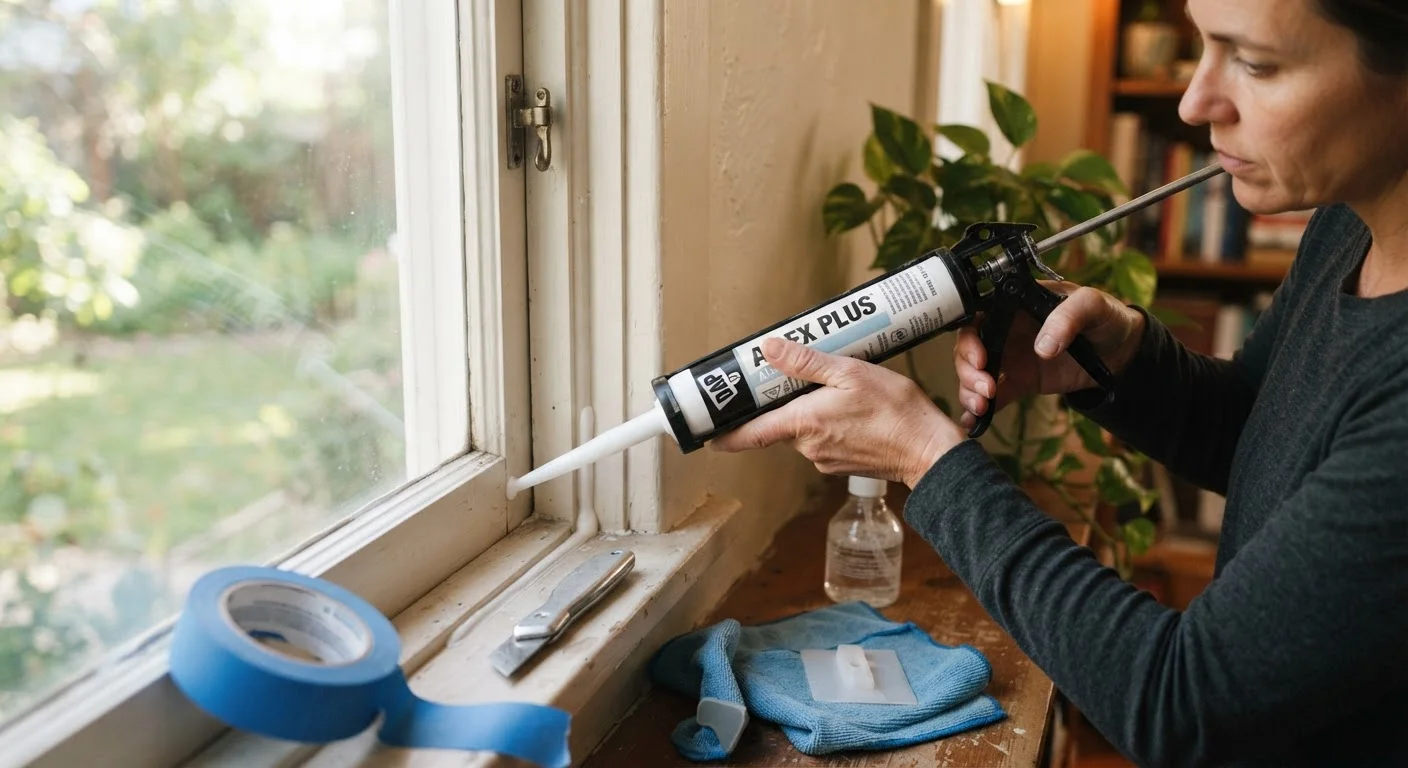
Photo: connectedsearches.com editorial
Key Takeaways
- Air leaks around windows, doors, and pipes are a common source of wasted heating and cooling energy in US homes.
- Caulk works best for stationary gaps; weatherstripping suits movable surfaces like door edges and operable windows.
- Most sealing projects cost under $30 in materials and require no specialized tools or prior experience.
- Finding leaks before you seal them ensures you address the actual problem spots rather than guessing.
- Sealing alone does not replace adequate insulation, but it complements it by stopping drafts at their source.
Why air sealing matters before you buy anything
Gaps and cracks in a home's envelope let conditioned air escape and outdoor air seep in. The U.S. Department of Energy has noted that air leaks can account for a significant share of a home's heating and cooling loss, though the exact figure varies widely by house age, construction type, and climate. For many families, that translates to a real and recurring expense that persists season after season.
The good news is that the fix is largely a materials-and-time problem rather than a skills problem. Caulk, weatherstripping, and foam backer rod are inexpensive, widely available, and designed for general use. What separates effective sealing from wasted effort is finding the right spots first. See our overview of home maintenance costs for context on where air sealing fits among annual upkeep priorities.
What you will need
Locating air leaks in your home
Before applying any materials, walk through the home on a cold or windy day with your hand held near common leak points. You are feeling for a slight draft or temperature difference. Common locations include:
- The perimeter of window and door frames, where the frame meets the wall
- The bottom gap of exterior doors
- Where pipes, wires, or ducts pass through walls or floors
- The joint between the foundation sill plate and the framing above it
- Electrical outlets and switch plates on exterior walls
- Attic hatch edges
A lit incense stick held near suspect areas works as a low-cost smoke test. Watch for the smoke to waver or bend toward or away from the wall surface. For a more thorough picture, a licensed energy auditor can conduct a blower-door test, which depressurizes the house and makes leaks easier to identify. If you want to understand which repairs are realistic to DIY versus worth professional assessment, this practical guide covers the distinction clearly.
Choosing the right sealing material
Matching the material to the location prevents wasted product and repeat repairs.
Caulk is for stationary gaps, meaning surfaces that do not move against each other. Window frames sealed to the surrounding wall, the joint between a door frame and siding, and penetrations where pipes enter the house are all appropriate caulk locations. Silicone caulk holds up in areas exposed to moisture; latex-based caulk is easier to clean up and paint over but is less durable in wet spots.
Weatherstripping belongs on surfaces that open and close. The sides and top of a door use compression or V-strip weatherstripping. The bottom of an exterior door typically needs a door sweep or threshold seal. Operable windows use foam tape or V-strip along the sash channel.
Foam backer rod fills wider gaps before caulk is applied. Pressing a foam rod into a gap wider than about a quarter inch gives the caulk a surface to bond to and prevents it from sinking into an oversized cavity.
Expanding spray foam works for irregular gaps around pipes and wires where caulk cannot reach. Use the minimal-expanding variety around window and door frames so you do not distort the frame.
For related skills around caulk application in bathrooms and kitchens, see this guide to grout and caulk repair.
Caulk gun
Applies tube caulk in a controlled bead along gaps and seams.
Utility knife or putty knife
Removes old, cracked caulk or weatherstripping before new material goes down.
Silicone or latex caulk
Seals stationary gaps around window frames, door frames, and pipe penetrations.
Weatherstripping tape or V-strip
Seals the moving edges of doors and operable windows to stop drafts.
Door sweep
Covers the gap between the bottom of an exterior door and the threshold.
Foam backer rod
Fills oversized gaps before caulk is applied so the caulk bonds correctly.
Minimal-expanding spray foam
Fills irregular gaps around pipes and wires where a caulk gun cannot reach.
Step-by-step sealing process
Work through exterior doors and windows first, as those locations offer the most consistent return. Then address pipe and wire penetrations, and finish with the attic hatch and basement sill if accessible.
Clear and clean the target surfaces
Remove all old caulk, foam, or weatherstripping from the area you plan to seal. Use a utility knife or putty knife to scrape away dried material. Wipe the surface with a dry cloth to remove dust, dirt, and loose paint. Caulk and adhesive-backed weatherstripping will not bond reliably to a dirty or damp surface.
Fill large gaps with foam backer rod
If a gap is wider than about one quarter inch, press foam backer rod into it with your finger or a blunt tool. The rod should sit slightly below the surface so the caulk can bridge across and bond to both sides of the gap. Skip this step for narrow hairline cracks.
Apply caulk to stationary gaps
Load a caulk tube into the gun and cut the nozzle tip at a 45-degree angle to create an opening roughly matching your gap width. Hold the gun at a consistent angle and move at a steady pace, applying light, even pressure. Pull the gun toward you rather than pushing it. After laying the bead, smooth it with a wet finger or a damp cloth within a few minutes. Wipe away any excess immediately.
Install weatherstripping on door edges
Measure the height of each door side and the width of the top. Cut V-strip or foam compression strip to length with scissors or a utility knife. Peel the adhesive backing and press the strip firmly into place along the door stop (the narrow ledge the door closes against). Close the door to confirm contact without excessive resistance.
Add or replace the door sweep
Hold the door sweep against the bottom of an exterior door so the rubber or brush seal makes contact with the threshold when the door is closed. Mark the screw holes with a pencil. Pre-drill if needed, then drive the screws. Check from inside the house on a bright day: no light should show through the bottom gap.
Seal pipe and wire penetrations with spray foam
Identify where pipes, electrical conduits, or HVAC ducts pass through exterior walls or between floors. Apply minimal-expanding spray foam into the gap around the penetration. Allow it to cure fully per the product label, then trim any excess with a utility knife. For gaps around gas lines, contact a licensed plumber rather than sealing them yourself.
What sealing cannot replace
Air sealing reduces drafts and lowers the workload on your heating and cooling system, but it addresses only one part of the thermal envelope. If your walls or attic have inadequate insulation, sealing alone will not reach its full potential. The two strategies work together. Comparing insulation types can help you decide whether adding insulation makes sense after you have addressed the leaks.
Also note that tightening a home's envelope affects indoor ventilation. In older, loosely constructed houses, some natural air exchange happens through leaks. If you seal aggressively, consider whether bathroom exhaust fans and range hoods are functioning and whether any combustion appliances, such as a gas furnace or water heater, are properly vented. When in doubt, consult a licensed HVAC professional before making major changes to a home's air sealing. For a broader view of managing home systems safely, this reference on home shutoffs and utilities covers related fundamentals.
The content provided on our blog site traverses numerous categories, offering readers valuable and practical information. Readers can use the editorial team’s research and data to gain more insights into their topics of interest. However, they are requested not to treat the articles as conclusive. The website team cannot be held responsible for differences in data or inaccuracies found across other platforms. Please also note that the site might also miss out on various schemes and offers available that the readers may find more beneficial than the ones we cover.